Create Mind Boggling Images Using Illusion Diffusion
One of the benefits of using open-source AI image generation models is that you can combine multiple models to create visually unique images.
By combining Stable Diffusion with ControlNets you can embed a pattern inside the generated image without it looking too obvious. Using these two types of models you can generate stunning QR Codes or you can create optical illusions, hence the name Illusion Diffusion.
That way it works is that the ControlNet takes in an input image, which I'll be referring to as the control image, and extract all of the features. Then stable diffusion takes the output of control-net and starts adding information while preserving the features of the original image.
The final output is an image which is a combination of the features from the control image with the styling from stable diffusion.
In this tutorial, I'll show how you can create AI generated images in the Stable Diffusion Web UI using Illusion Diffusion.
Setup
To follow along, the Automatic1111 stable diffusion web UI is required, and it can be installed using the instructions provided here.
After setting up the UI, the next step involves downloading a couple of models.
1. Safetensors
2. CKPT
CKPT files can contain malicious code, so only download them from a trusted source. Safetensors on the other hand are generally safe to use, as the name suggests.
- Download the ControlNet
- Go to hugging face and download the safetensors file, it should be something like
control_v1p_sd15_qrcode_monster.safetensors - Next, navigate to the root directory of your
stable-diffusion-webuirepository. From there, navigate tomodels/ControNetand place the safetensors file there.
- Download the Stable Diffusion Model
- You can use any variant of Stable Diffusion 1.5 that you like, I'm using the Artistic-Mix version
- Download the safetensors file and paste it inside the
models/Stable-diffusiondirectory
To make the newly downloaded models visible to your system, simply restart the stable diffusion UI.
Configuring the Stable Diffusion Web UI
Before we can start generating images, we need to configure the UI with the correct models and parameters.
Step 1: Selecting the stable diffusion model
First, select the stable diffusion model using the dropdown under Stable Diffusion checkpoint. As previously stated, I'm using the artisticmix model, but any Stable Diffusion 1.5 model variant should be compatible.
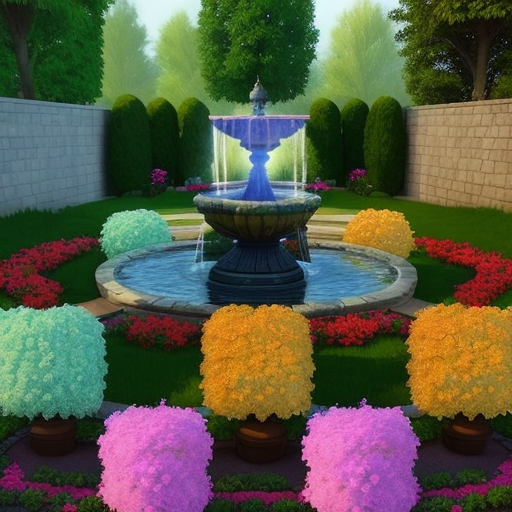
Next, type in the prompt. You can begin by using the prompt below to test things out.
A garden with colorful flowers and trees, large fountain in the middle, stone walkway around the garden, 4K, trending on artstation, highly detailed
Step 2: Configuring parameters for Stable Diffusion
Now we need to modify a few parameters for the Stable Diffusion model.
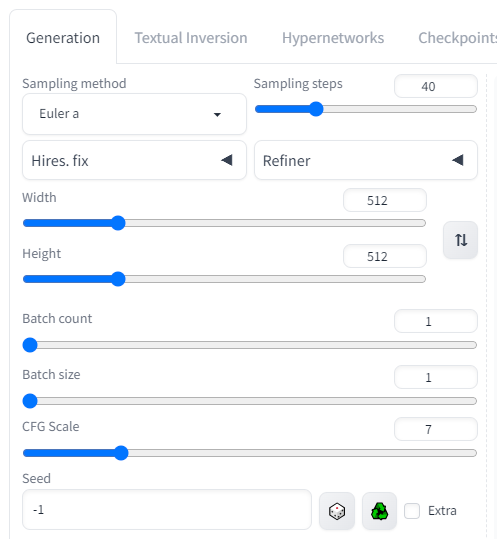
Most of the parameters I left as is. Here are the ones I changed:
- Sampling method: Euler a
- Sampling steps: 40
- CFG Scale: 7
Based on my experimentation, I've found the Euler a sampler does a good job for image generation. Regardless of which sampler you use, the output will be pretty similar.
The sampling steps parameter allows you to control the number of iterations the model has to make before outputting the final image. A range between 30-50 works well for most images. Note that a high number of sampling steps, greater than 50, usually does not result in better images.
The CFG scale tells the model how closely it needs to stick to the prompt. A higher value encourages the model to generate images closely aligned with the prompt's description, while a lower CFG value grants the model more creative freedom.
Step 3: Setting up ControlNet
The last thing we need to do is to select the ControlNet model and configure its parameters.
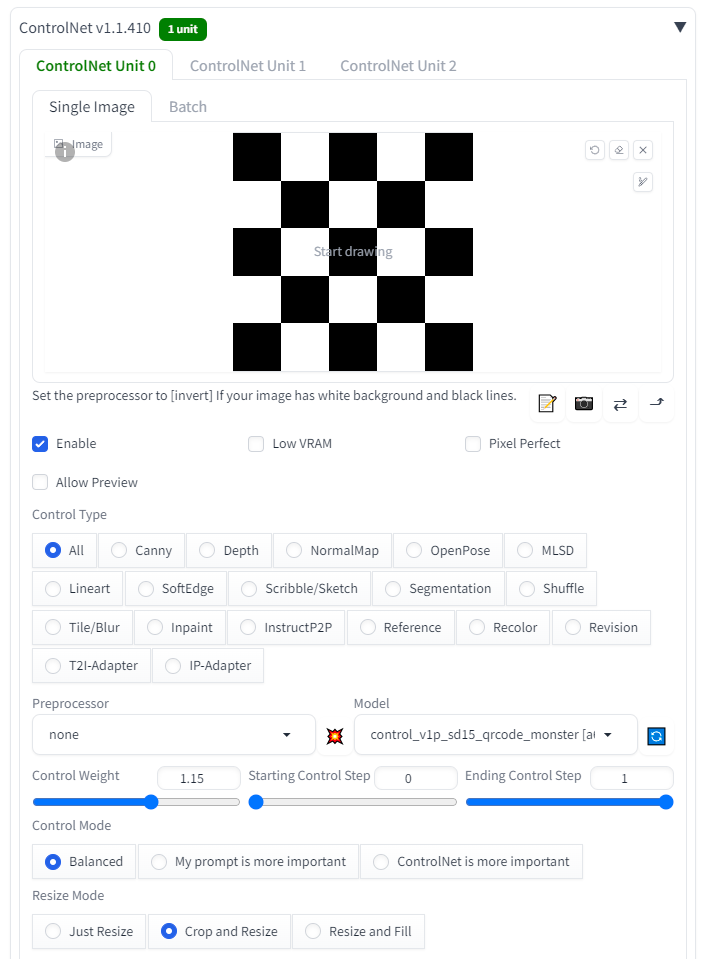
Here are the parameters you need to modify:
- Make sure
enableis checked - Select a control image (I have a few patterns below you can use)
- Under the model dropdown, select the
control_v1p_sd15_qrcode_monstermodel - Control Weight: 1.15
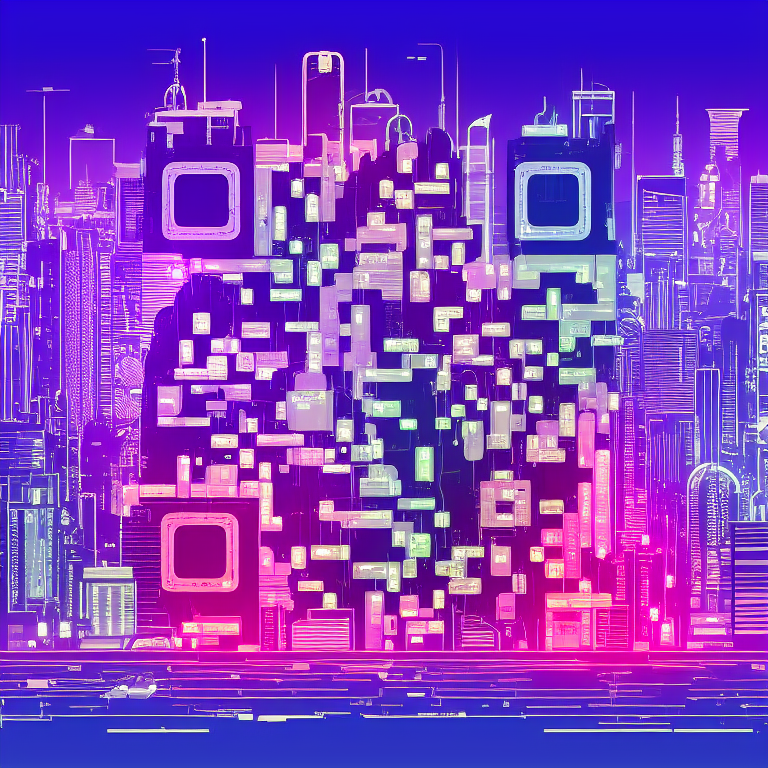
The qrcode monster model is primarily crafted for generating QR codes using Stable Diffusion, yet it is versatile enough to work with various other patterns.
The main parameter for ControlNet is Control Weight. Control Weight tells the model how much of the control image it should blend into stable diffusion. A higher value such as 3 will result in the control image being dominant, while a lower value such as 0.1 will result in the control image being non-existent.
Determining the control weight is not a one-size-fits-all process, and it varies depending on the specific image. In general a range between 0.9 - 1.3 works well for most images.
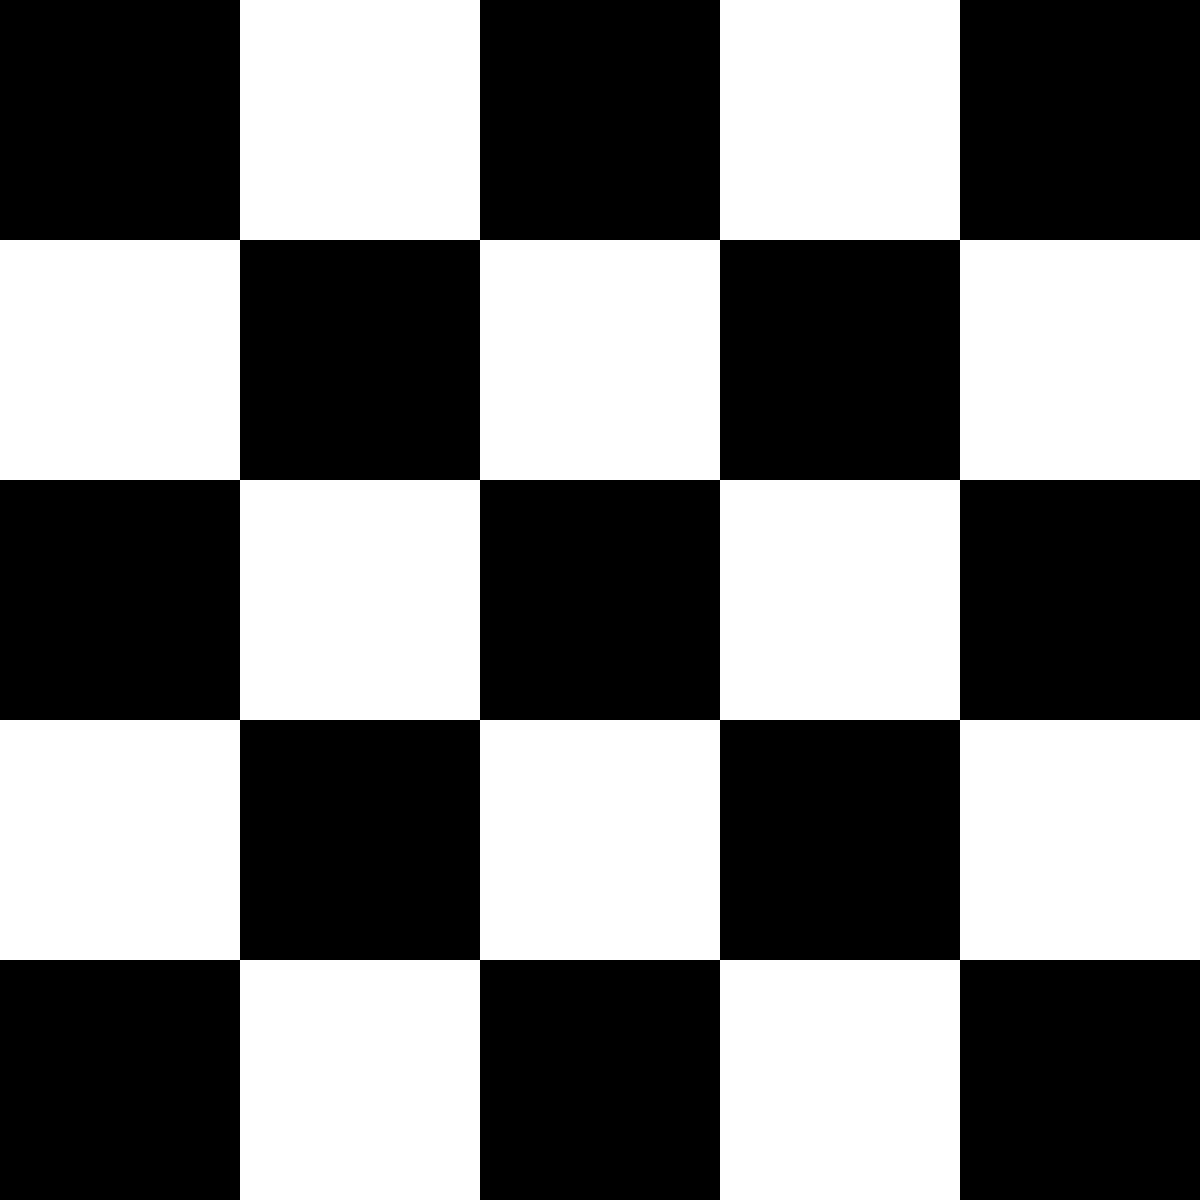
Here are a few patterns you can use as the control image:

Generating Images
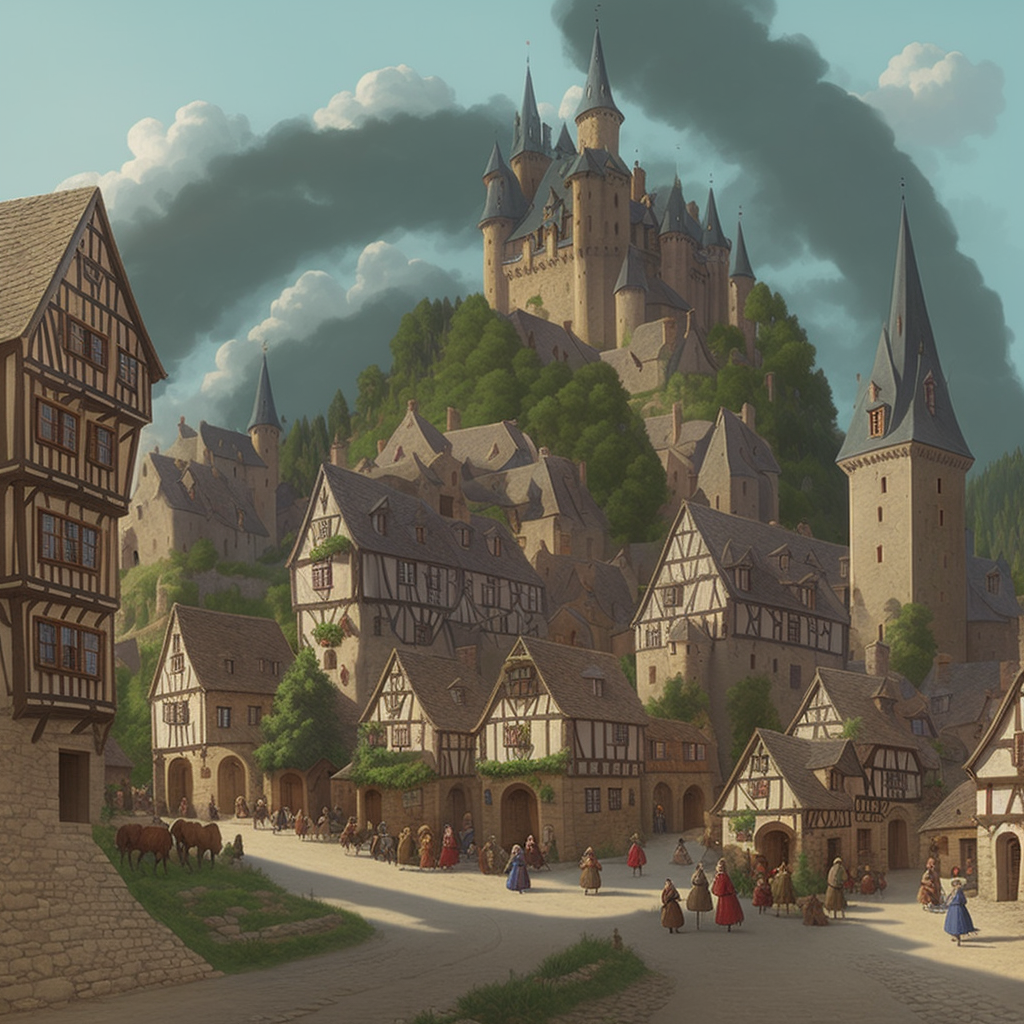
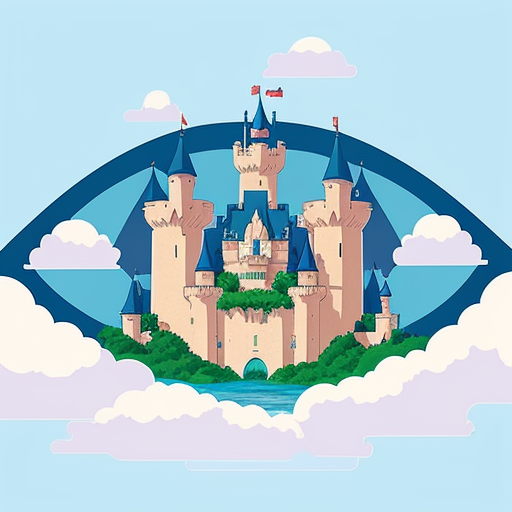
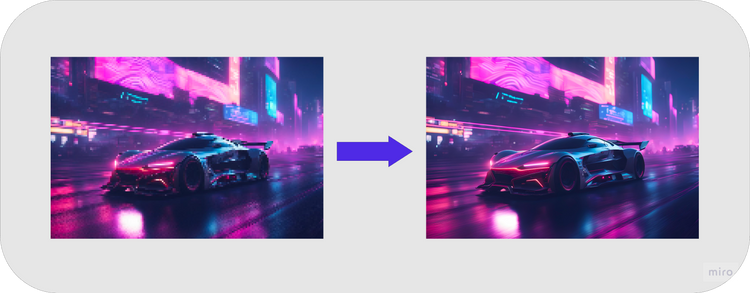
Simply click the generate button and you should see a cool image like this:
In this image, the checkered control image is combined with the output of stable diffusion to create a new image which has the properties of both models.
Here are some important things to consider when generating images:
- All the prompting tricks that work with Stable Diffusion prompts work with this model as well, so use that to your advantage
- Prompts are extremely important. Not all prompts work well with all control images. Certain control image patterns suit a particular prompt more than others.
- Use the control weight parameter to change the visibility of the control image.
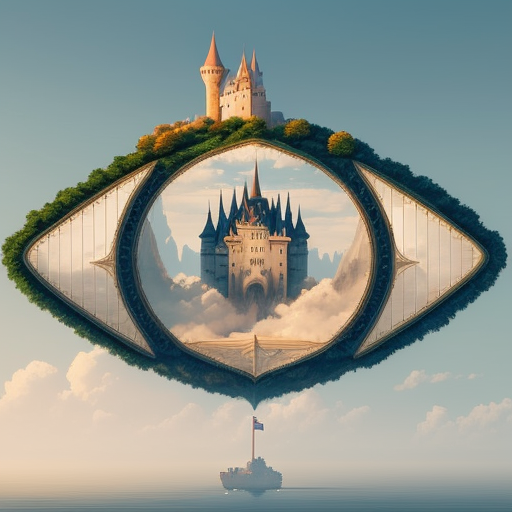
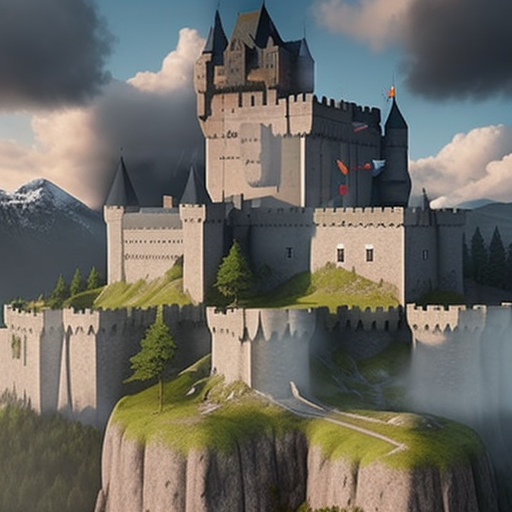
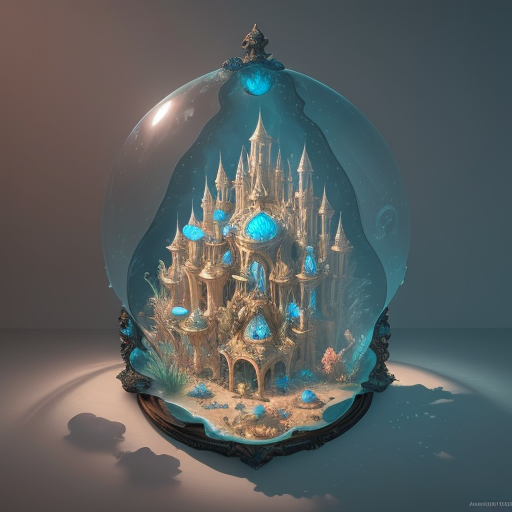
Using these principles you can create images like so:

Closing thoughts
- The image you're envisioning might not have been generated in the first iteration. Try generating multiple pictures using the same prompt and parameters, before making changes
- Try out different ControlNet patterns. All you have to do is do a google search like
raindrop drawing black and white. You can even use a QR code image as that is what this ControlNet model is built for. - Play around with the CFG scale, samplers, and control weight to get a feel of how these affect image generation
- The stable diffusion model plays a big role in the quality of the generated images. Try out other variants of Stable Diffusion 1.5 to create images in a different style.
I hope you enjoyed reading this post. If you like this type of content, consider subscribing (rest assured, I won't spam your inbox).
Thanks for reading!
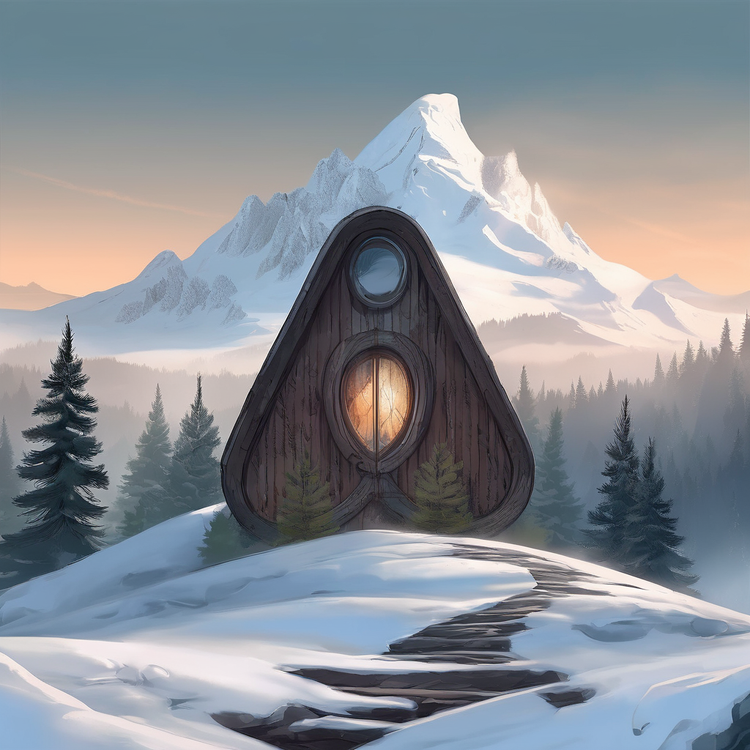
Some more images for inspiration...


Member discussion