Embedding Logos Inside Images Using SDXL and ControlNet
You might have seen pictures like this on the internet and wondered how they were created:
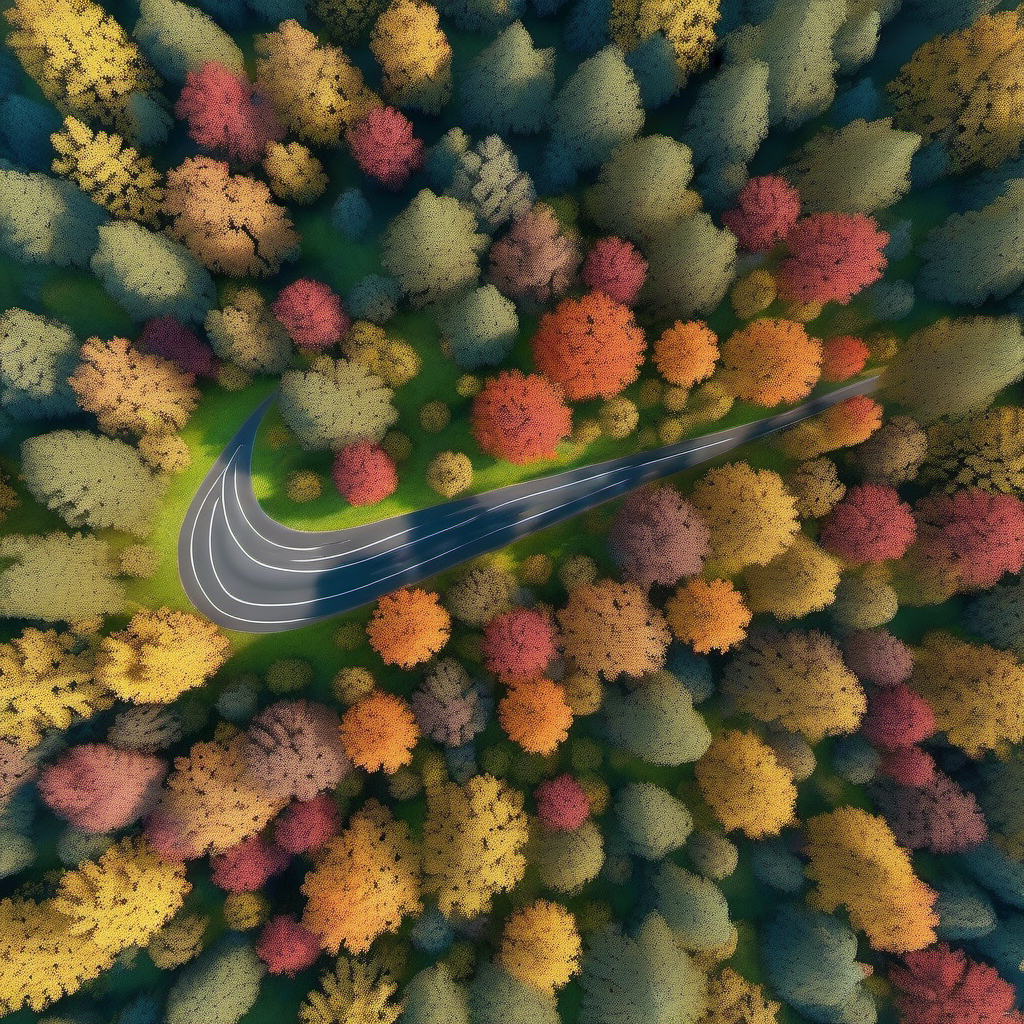
The image above was created using a generative AI model called SDXL along with another model called ControlNet. Previously, I wrote a blog post showcasing how optical illusions can be generated using the same technique.
In this blog post, we'll be using a newer stable diffusion model called SDXL and a compatible ControlNet. Let's get started!
Setup
To generate these images we'll be using the Automatic 1111 web ui. There are a couple of models you'll need to download.
- Download the safetensors file for SDXL via hugging face. Place this downloaded file inside the
models/Stable-diffusiondirectory in the stable diffusion web ui. - Download the VAE for SDXL and place it inside the
models/VAEdirectory. - Download the ControlNet which will be placed inside the
models/ControlNetdirectory.
With these models downloaded and placed in the proper directory, we are ready to launch the stable diffusion web ui.
Configuring the web ui
Launch the web ui and and select the sdxl model and the vae at the top.

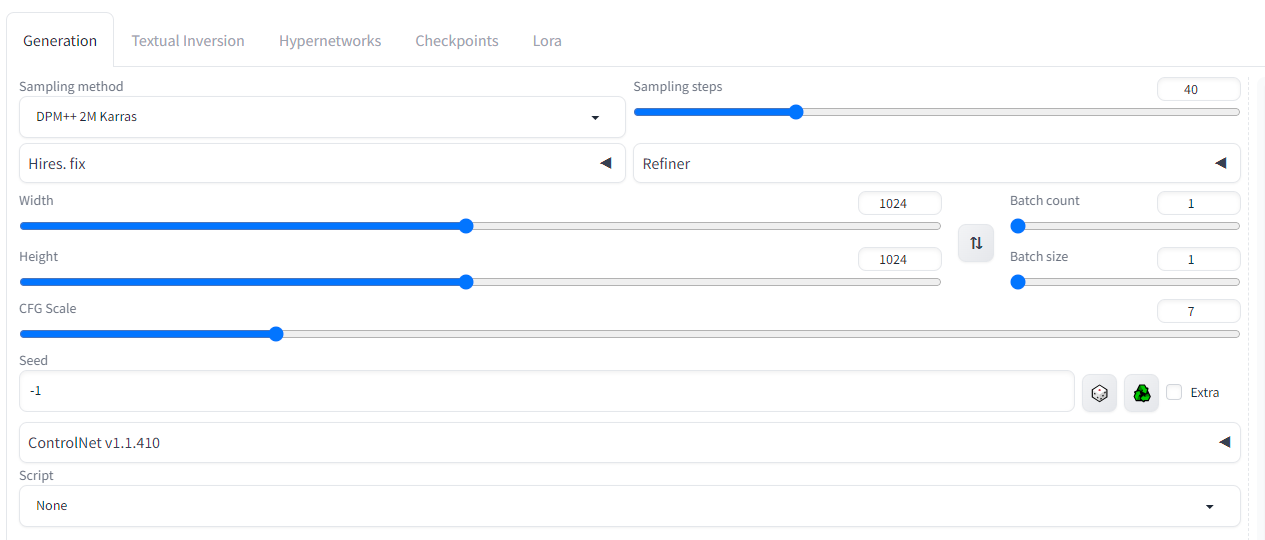
Under the generation tab, set the follow parameters:
- Sampling steps: 40
- Width: 1024
- Height: 1024
Under the ControlNet setting make the following changes:
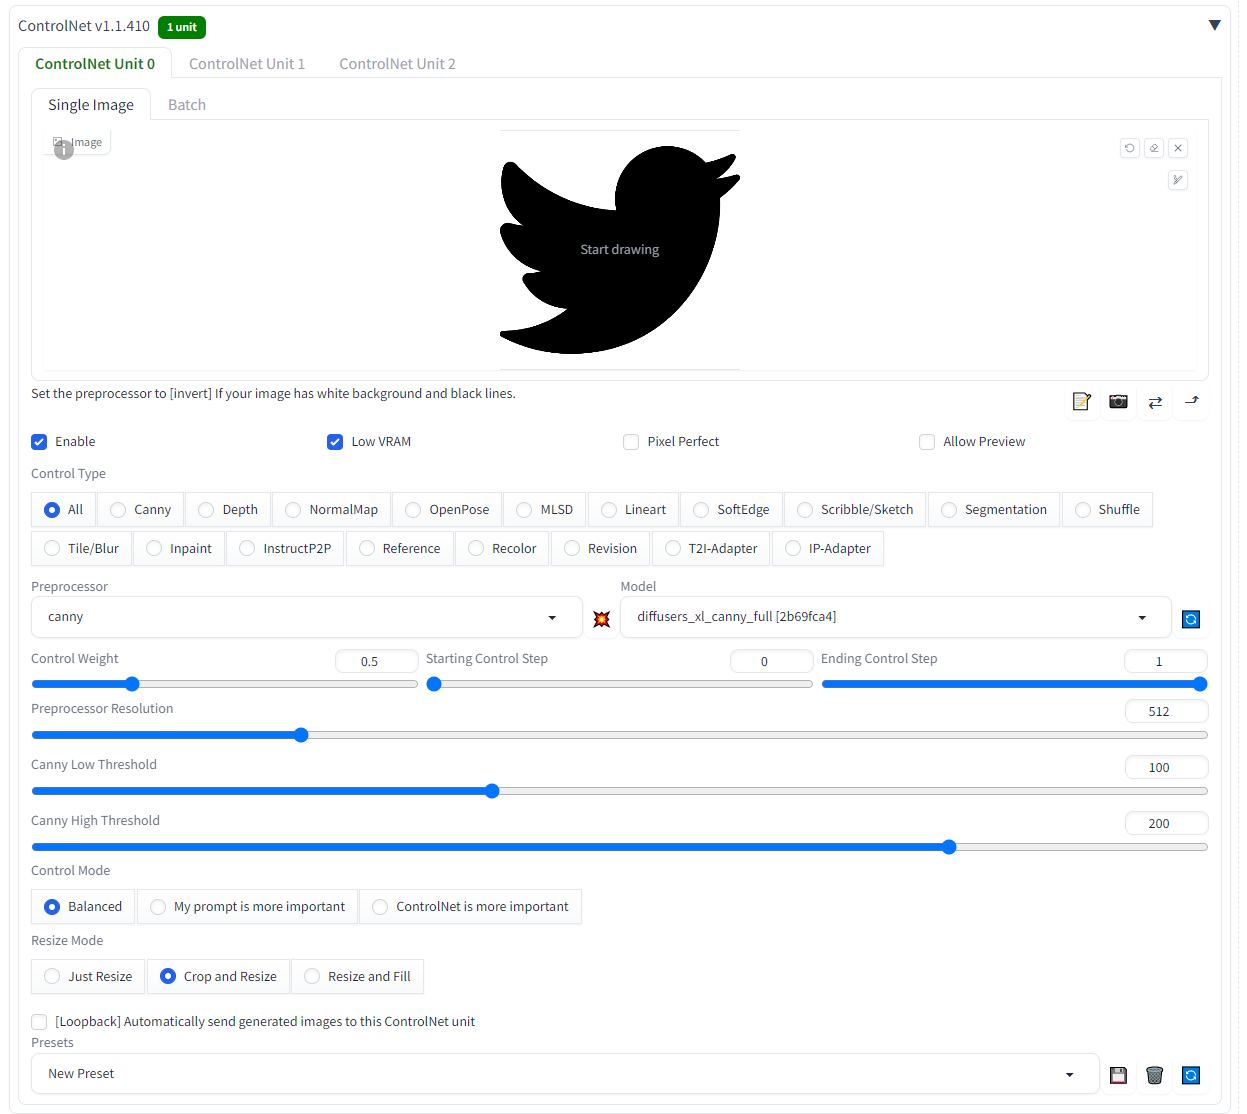
- checkmark enable
- checkmark Low VRAM
- Preprocessor: Canny
- Model: diffusers_xl_canny_full
- Control Weight: 0.5
- Control Mode: Balanced
Upload an image mask of choice as the Single Image for the ControlNet. I'll be using this twitter logo initially.
Last but not least, put in the prompt. Here is an example prompt:
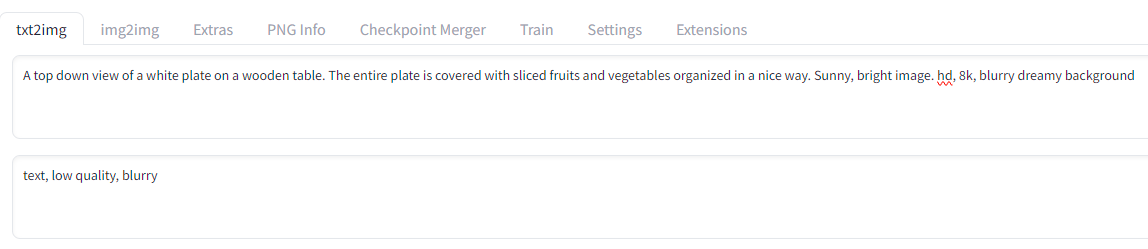
A top down view of a white plate on a wooden table. The entire plate is covered with sliced fruits and vegetables organized in a nice way. Sunny, bright image. hd, 8k, blurry dreamy backgroundAfter clicking Generate here is the result:
Understanding The ControlNet Settings
When generating images with ControlNet there are a few things to keep in mind:
- Not all prompts work well with the control image(logo)
- In the image above, the twitter logo blends naturally, but not all logos can be forced to fit a prompt. Take a good look at the logo you are trying to embed and imagine where that logo would fit naturally.
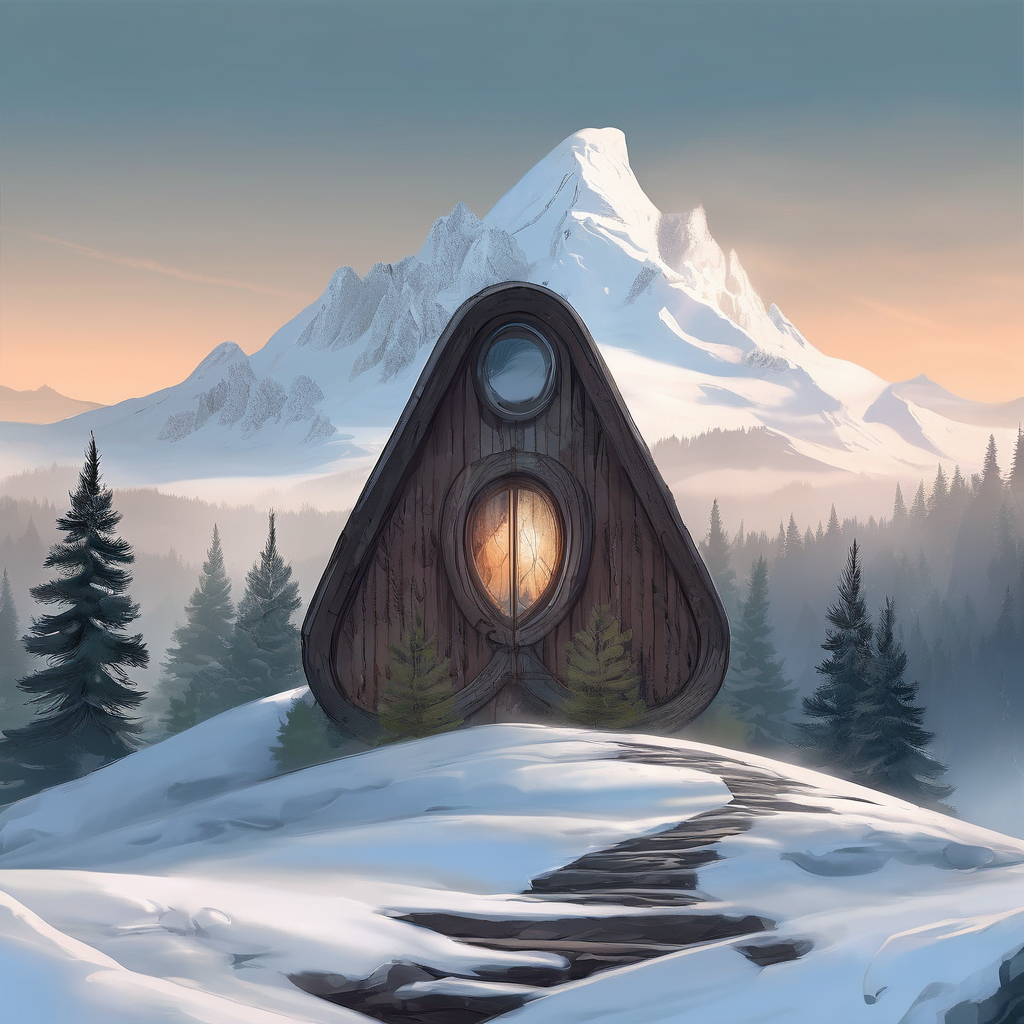
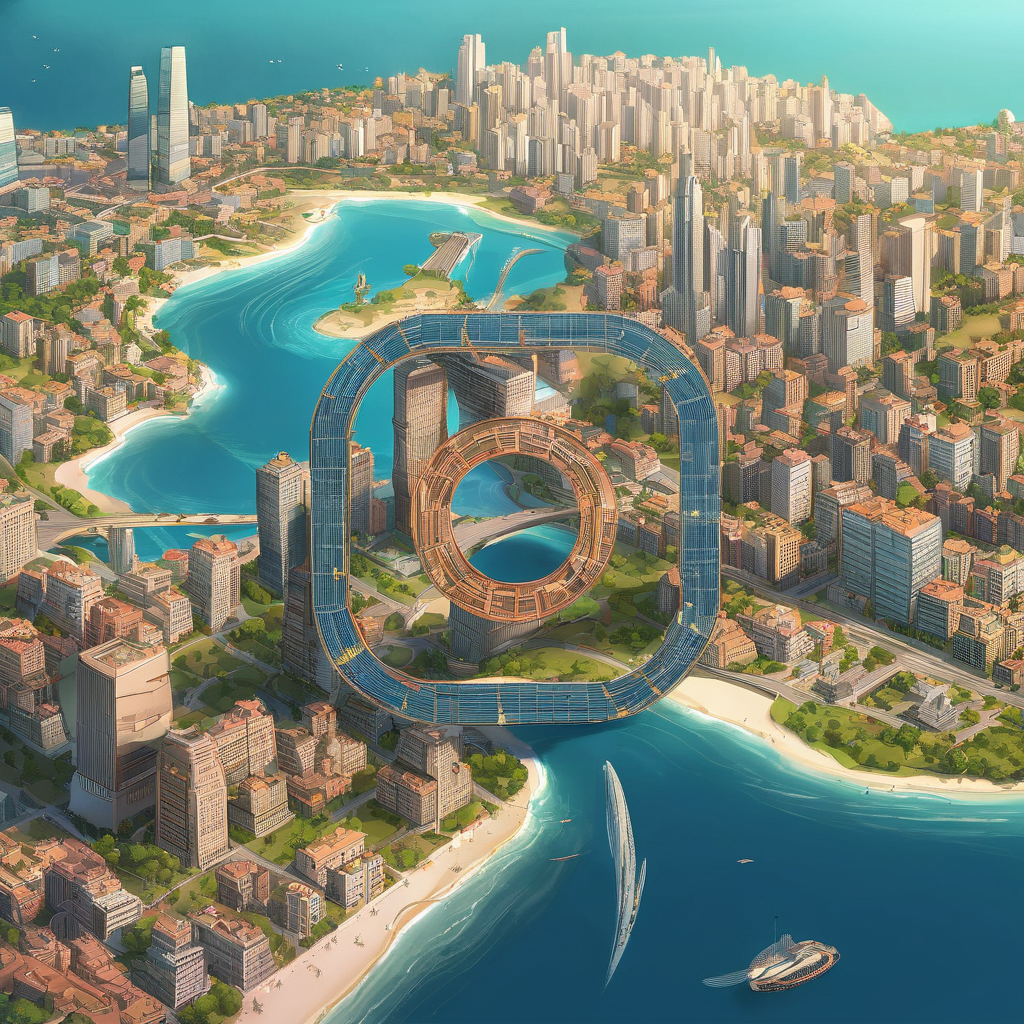
- For example, the Airbnb logo looks like a mountain so I used the following prompt to generate an image:
illustration of a snowy mountain. spruce and pine trees on the mountain. misty atmosphere. 8k, hd. trending on artstation

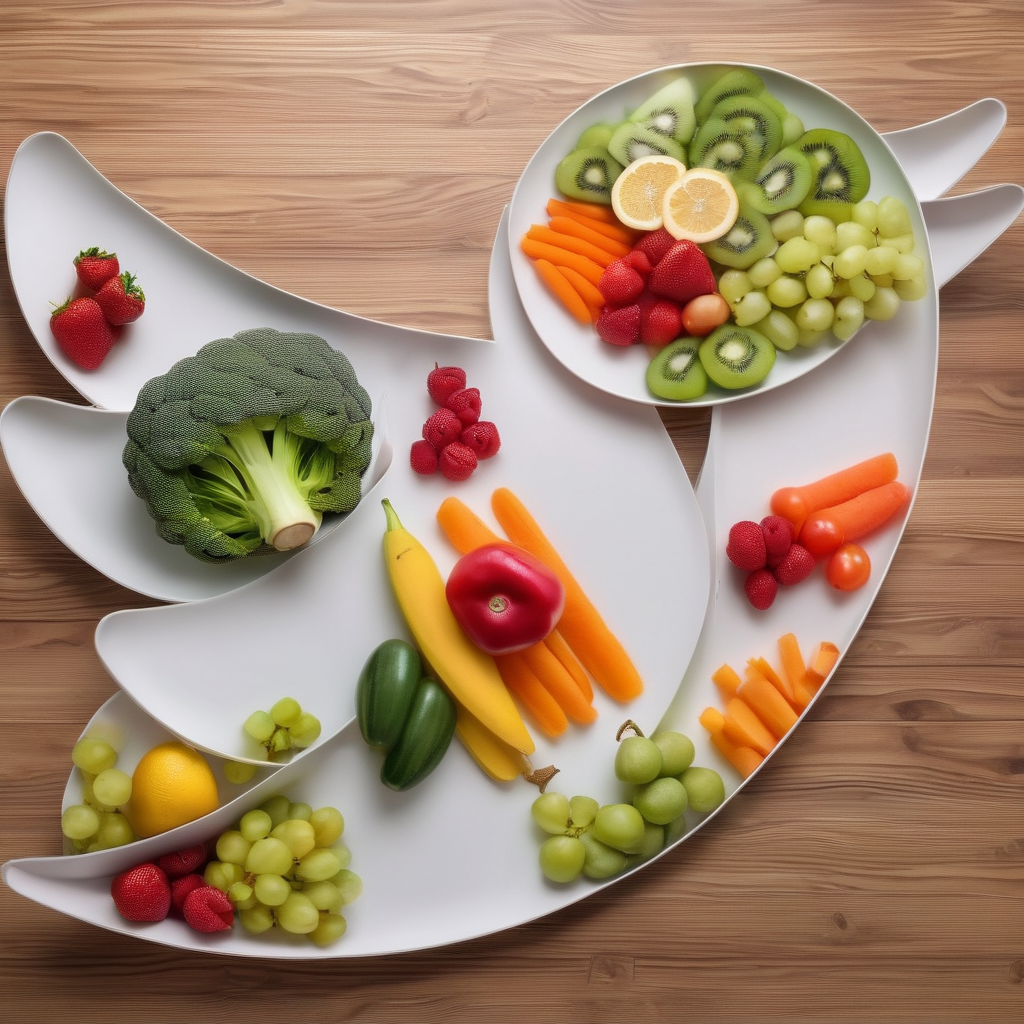
On the flip side here is an example of the Instagram logo that did not blend very naturally.
Even though the logo is visible, it just looks a bit odd compared to the rest of the image.
- Use the
Control Weightparameter to change the visibility of the logo
- The control weight is one of the most important settings for ControlNet as it allows you to change how well the logo blends with the image.
- A low value such as 0.1, will make the logo less visible while a higher value such as 1.0 will make the logo too obvious. The key is to pick a value that blends the logo with the rest of the picture in a natural way.
- There is no magic control weight that will work for all images. In fact, for each logo, you will have to tweak the value slightly to get the desired results.
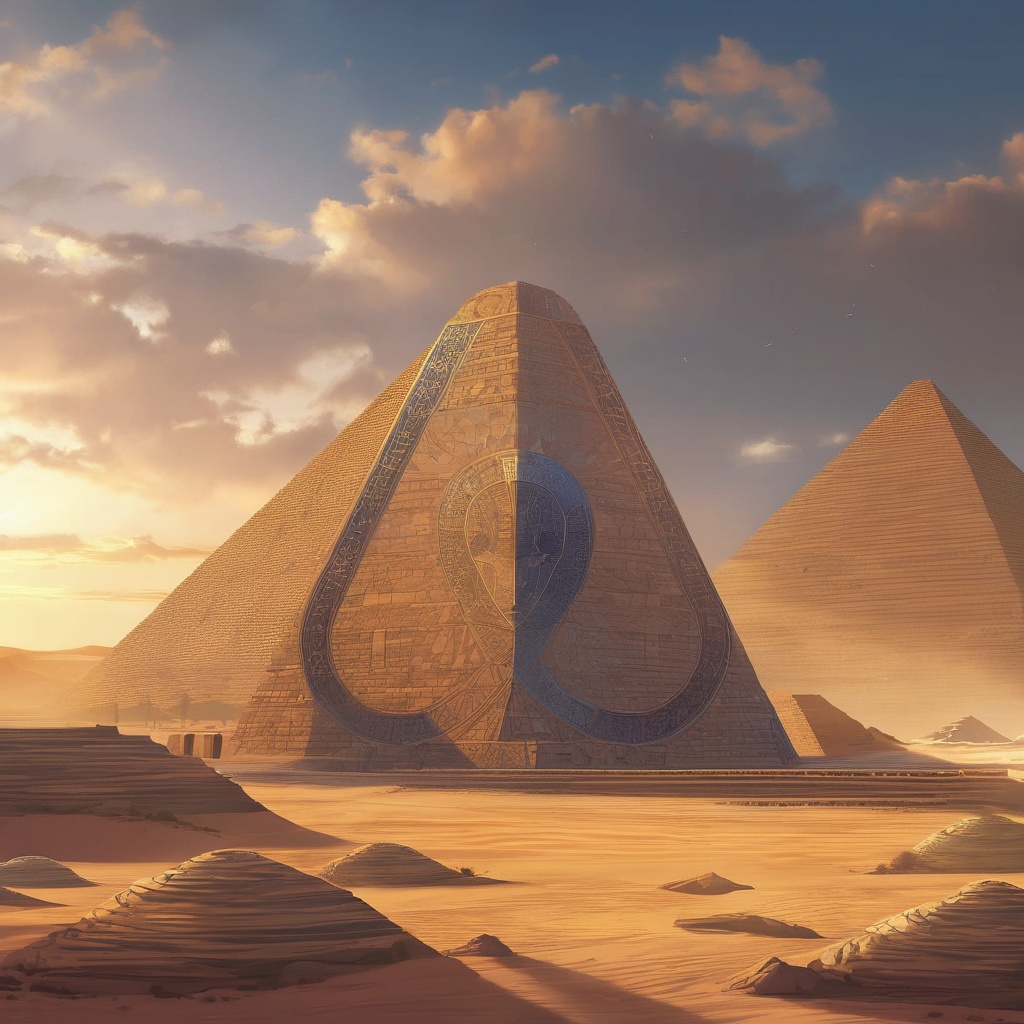
illustration of the pyramids. 8k, hd. trending on artstationControl Weight: 0.6
A highly photorealistic image of a sandy beach next to the ocean. Slightly above shot looking down at the sand. 8k, hdControl Weight: 0.45

- The control image works well if it has a white logo on a black background
- Initially, when using this controlnet I used the original logo for each brand. The results weren't great. After playing around a bit more, I found that using a white logo on a black background tends to yield better results.
The logo on the right may be easier for ControlNet to work with
Here are all the logos used for this post:
Because all of the control images are preprocessed using a canny edge detector, the color or background of the logo should not matter much. However, to ensure that there are no problems with the control image it is good practice to provide a black and white image like the ones shown above.
Conclusion
In this post, I showed how logos of any brand can be embedded inside an image using SDXL and ControlNet. The application of this is quite widespread and can be used to create ads or marketing content.
For the time being there are still some limitations with generative AI, such as not being able to position the logo in a specific spot. Things like the color, pattern, and texture of the logo also cannot be customized. This is likely to change in the near future as these AI models are progressing quite rapidly.
The long term impact of this technology may fall on graphics designers as their skills may not be required to create basic artwork or initial designs. Ideally, we want a future where graphics designers feel empowered by AI tools to make their job a bit easier.
I hope you found this post valuable. If you'd like to see more content like this, please consider subscribing.
Thanks for reading!

Member discussion